You are using an out of date browser. It may not display this or other websites correctly.
You should upgrade or use an alternative browser.
You should upgrade or use an alternative browser.
Open Segment Project - Maze
- Thread starter Bob Beaupre
- Start date
Glenn McCarron
PRO Member
Somehow I know the routine, just that I only have a X 72 factor. You have a higher degree of difficulty. Great documentation of the process.
It's really more tedious than harder, more parts and pieces to deal with. Small parts with big fingers, more attention to the small things. Seems unevenness of the wood or a rougher cut is much more magnified on these small pieces. The new thin kerf 90T Diablo Ultra Flawless Finish Crosscut blade certainly has helped
Well I think I made a good upgrade to my procedure today.
Up till now I have been using a screen print of the paint page as my reference for my pattern in this case it looks like this

But wanted to take some of the human ( that would be me) factor out of the equation
Since I have a computer on my fixture for running my indexing program it was easy to be able to flip back and forth between the indexing program and the ring view for my bowl design. I added a paper index sheet on my fixture with the reference numbers relating to the ring summery numbers along with a index point
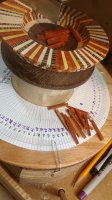
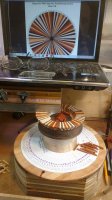
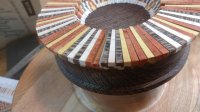
So row six is complete
Up till now I have been using a screen print of the paint page as my reference for my pattern in this case it looks like this

But wanted to take some of the human ( that would be me) factor out of the equation
Since I have a computer on my fixture for running my indexing program it was easy to be able to flip back and forth between the indexing program and the ring view for my bowl design. I added a paper index sheet on my fixture with the reference numbers relating to the ring summery numbers along with a index point


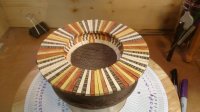
So row six is complete

Glenn McCarron
PRO Member
HI Bob, I always found it easier for me to use the ring view pages to line up my segments. I do print out the Paint view as well for a reference. What I have been having a hard time wrapping my head around is the numbering sequence. I think it is backwards for using the Driskill Jig. It may match the numbering on the stomper plates but the stomper plate you flip upside down when you put it together thus reversing the numbers as they appear. I think maybe there should be an option as to which way you want the numbers to run, for Stomper or for Driskill. That being said I have been able to adapt to looking at it in reverse (counting down) instead of counting up.
Whats your thoughts with your process? Maybe the left and right side of my brain is wired backwards???
Whats your thoughts with your process? Maybe the left and right side of my brain is wired backwards???
I've always had the same problem, but they all work, you have to work backward. That's when my brain was not working right.
When I taped the number index on my fixture aligned with my zero point and then looked at the paint page and then indexed the bowl to the next segment it all lined up.
In your case your first piece is 72 then 71 if you look at the paint page. I just numbered my paper index that way and everything is fine.
By using the paper index I get an extra confirmation as far as what piece goes on next and if I get interrupted it's easy to figure where I was
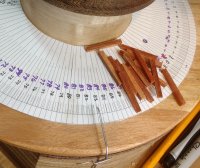
I'll have to make a neater looking sheet buy it works great
When I taped the number index on my fixture aligned with my zero point and then looked at the paint page and then indexed the bowl to the next segment it all lined up.
In your case your first piece is 72 then 71 if you look at the paint page. I just numbered my paper index that way and everything is fine.
By using the paper index I get an extra confirmation as far as what piece goes on next and if I get interrupted it's easy to figure where I was

I'll have to make a neater looking sheet buy it works great
Glenn McCarron
PRO Member
Once you get that first piece placed the pattern does flow pretty well. I usually organize a section then confirm that it is right and then keep organizing more sections. Always keeping an eye on the build below your current ring as well for any glooming errors. It has happened!
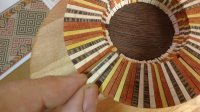
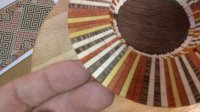
Row 6 got cut off, I slipped with the sanding board and broke off of the outer ends of some of the segments.
We will re cut and reinstall
We will re cut and reinstall
Glenn McCarron
PRO Member
Row 6 got cut off, I slipped with the sanding board and broke off of the outer ends of some of the segments.
We will re cut and reinstall
I am so paranoid of just that happening. I'm getting up the wall of my bowl a bit better now so the ends are much shorter.
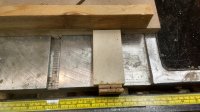
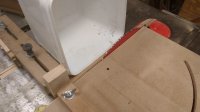
Bob, how do you keep the "catch bucket" from moving? that is how is it mounted to the table saw?
If is not mounted. I would guess a good rare earth magnet in four spots would hold it. Magnets could be held in place with some epoxy. I have done that in the past to hold a zero clearance ramp in place.
If is not mounted. I would guess a good rare earth magnet in four spots would hold it. Magnets could be held in place with some epoxy. I have done that in the past to hold a zero clearance ramp in place.
If you cut a hole in the back and stuck your shop vac in it would pull the segments away from the blade. Be sure and put a piece of screen over the vac hose end so you don't suck the segments in. At one time Lloyd was developing something along this line to be used with a miter saw.
Mike right now it just sits there.
Stuart I tried using the shop vac with a dust deputy, but with the small parts I'm cutting it broke a bunch of them. I'll have to try the screen. Thanks
Stuart I tried using the shop vac with a dust deputy, but with the small parts I'm cutting it broke a bunch of them. I'll have to try the screen. Thanks
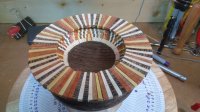
Row 6 back on
Lloyd it's all YOUR fault.
Going to Boston you gotta see Tom Lohman you'll really like his stuff, he says.
You'll like his work, he says.
I think his stuff is right up your alley he says.
Thanks Lloyd
Now I'm hooked
Going to Boston you gotta see Tom Lohman you'll really like his stuff, he says.
You'll like his work, he says.
I think his stuff is right up your alley he says.
Thanks Lloyd
Now I'm hooked
I think I hear him snickering. 
Glenn McCarron
PRO Member
Looking good Bob.
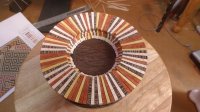
with a little struggling we managed to get row 8 on and is now drying. I decided to upgrade my table saw sled to one similar to what Brent and Glenn are using. Now, with the new blade and the updated sled there is almost no need to sand the segments. Also, getting the correct S.E.L. is much easier.

