Yes it hurts, I'd be lying if I said it doesn't. But, we move on.
You are using an out of date browser. It may not display this or other websites correctly.
You should upgrade or use an alternative browser.
You should upgrade or use an alternative browser.
Collaborative Bowl Project - Closed Segment
- Thread starter Glenn McCarron
- Start date
Glenn McCarron
PRO Member
Sorry to read that thread Bob, I didn't see that coming. That being said I think we all have done it at one time or another. Makes me more nervous pushing on with my bowl.
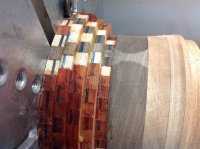
I was at fault, not the bowl. I knew I was getting thin and turning up at the top lip was in a little bit of an awkward position. That being said, I had also, lost some of my leeway in wall thickness with the use of the Seg-easy zero plate. Remember the mismatch of the edges both on the inside and outside. That was my extra wall thickness. So again I learn something, the HARD way.
Didn't I tell you at the beginning of this adventure I'd keep you amused.
Just trying to keep a sense of humor about this whole thing.
Carry on you'll do fine
Didn't I tell you at the beginning of this adventure I'd keep you amused.
Just trying to keep a sense of humor about this whole thing.
Carry on you'll do fine
Glenn McCarron
PRO Member
I find sometimes I don't think situations through far enough and everything has consequences.
I find sometimes I don't think situations through far enough and everything has consequences.
You are right on that
Looking back at my WTP file and compensating for what I think I lost in the jig, at best I think I would have had a 0.17" wall thickness when finished. I should have made some adjustment right away. But who knew, this is all new stuff to me.
Glenn McCarron
PRO Member
Unfortunately if your like me I'm in my shop exclusively by myself with little resources for help. That is why this site (and probably others) are a valuable resource to me. Unfortunately again is that most suggestions come from the aftermath of a situation. That is why I also like to post lots of pictures as I keep going in hopes that another set of eyes will pick up on something that I am doing wrong and make suggestions.
Glenn McCarron
PRO Member
D
David Creed
Guest
Thats so bad, is there a way to true up both ends and re-glue, i would hate to lose so many hours of work
Thats so bad, is there a way to true up both ends and re-glue, i would hate to lose so many hours of work
No, parts are to thin, and is in an area where diameters are changing so I cannot remove materials
Glenn McCarron
PRO Member
Great, slow and easy
Glenn McCarron
PRO Member
It looks like your orientation changed about 10:00 in the ring.
How are you using the center disc or did I miss it in an earlier post?
How are you using the center disc or did I miss it in an earlier post?
Glenn McCarron
PRO Member
It looks like your orientation changed about 10:00 in the ring.
How are you using the center disc or did I miss it in an earlier post?
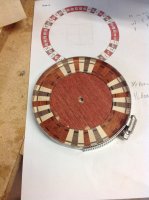
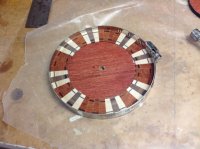
Yep, your right. Not sure how I did that but it seems tight and doesn't affect the pattern. The centre disk is purely to help keep things round. I take it out once the glue is set. I have to make a different one for each ring.
Glenn McCarron
PRO Member
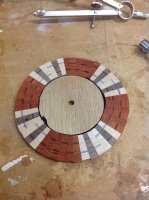
Stuart, initially I started out by cutting a circle template for around the outside to force the ring round. That proved a bit cumbersome so I moved to cutting a disk to put in the centre that was just shy of the inside diameter. Too big and the segments don't pull together, too small and the hose clamp can force it out of round and that would mess with the alignment. Do you have an easier way? I did try the elastic band route but I guess I have too many thumbs for that.It looks like your orientation changed about 10:00 in the ring.
How are you using the center disc or did I miss it in an earlier post?
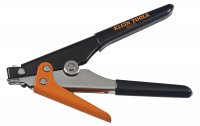
Many different ways to skin this cat. I use zip ties and just snug them up loosely to make sure the outside corners tips are all aligned. I then use a tightening tool to pull it tight. I have used disks slightly larger than the center to hold the rings flat and then secured with rubber bands but usually if I'm going to use rubber bands the ring is small enough I can hold it down. On thing I found that made adding the band was to start with it around my wrist on the hand holding down the ring. If I try holding it in my hand segments go flying.
Glenn McCarron
PRO Member
Many different ways to skin this cat. I use zip ties and just snug them up loosely to make sure the outside corners tips are all aligned. I then use a tightening tool to pull it tight. I have used disks slightly larger than the center to hold the rings flat and then secured with rubber bands but usually if I'm going to use rubber bands the ring is small enough I can hold it down. On thing I found that made adding the band was to start with it around my wrist on the hand holding down the ring. If I try holding it in my hand segments go flying.
What type of tool do you use to tighten the zip ties?
Glenn McCarron
PRO Member
Thank you Stuart. I'll have a look next trip out to the hardware store. I assume they will work on all different sizes of ties?

