• Are you looking for a coupon code to buy my software? You can get one from lots of 3rd party sites but they won't work. My software never goes on sale and has never been discounted. The only coupon codes that are given is when I give a club presentation and I offer a discount to the attendees. Other than that, everyone pays the same price.

How to cut lamination segments

LHT

PRO Member
HI,

I'm working on my 1st bowl and am perplexed on how to cut the feature ring lamination.

Segment Pro gives me a board width of 1.20, length 42.2, S.E.L. 5.0, 9 segments, 1.75 thick, angle 20 for an outer diameter of 13.7".

Lamination Pro tells me to cut the board into 2 3/4" strips at 14 degrees.

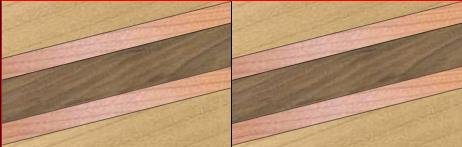
If you look at the diag-stripe lam file it shows the laminate needs to be cut at several angles to the the outside maple strips into a triangle shape. I need to crosscut the lamination at an angle then rip the pieces at an angle then somehow cut the bevel on the ends to make the circle.

How do you guys do this? Compound miter cuts short circuit my brain.

Thanks for your guidance,

Lee
 

Attachments

  • diag-stripe-2.lam
    1.9 KB · Views: 8
  • diag-stripe2.jpg
    diag-stripe2.jpg
    11.9 KB · Views: 6
  • diag-stripe bowl plan.pdf
    84.4 KB · Views: 9
Hi Lee:
Thanks for posting the summary table from SP and the LP file. It helps a great deal in working on a response.

A little background.
SP has your featured ring made up of 9 segments. Each segment needs to be 1.17 (rounded to 1.2) wide, 1.75 thick (height), and 4.994 (round to 5.0) inch length (SEL).

When using Lamination Pro (LP) with SP the important point is to get the Repeating Unit as close to the SEL as calculated in Segment Pro.
In your case the Repeating Unit of 5 is good.

You do not need to make a compound cut. The design you have is made up of repeating pairs glued together. That creates a segment. After triming you should have a block of wood that is 1.2" thick x 1.75 height, and 5" in length. the 5 inch side is what will get mitered at 20 degrees


Take a look at the Incra file. It shows a simple jig to cut your segments.
Basically you would put the featured segment on a cutting sled and miter one side. then you miter the other.

diag 2.jpg
 

Attachments

  • incra segmented_ring_jig_08.pdf
    501.5 KB · Views: 28
Hi MFisher,

Thanks for the info, that helps. I have all the ring segments cut out and glued together. I haven't stack glued the rings yet. I'm still having trouble wrapping my mind around how to cut the feature ring from the stock I have glued up. Would you make the miter cuts, then glue up the pairs that make up the segments, then rip the pieces to width? Then make 20 degree bevel cuts on the ends?
I'm probably making this more complicated in my head than it is.

Thanks for the help,

Lee
 
If I was doing the project I would
- glue up the boards to make the laminate.
- cut the laminate at the 14 degrees to create the repeating pairs.
- I would carefully measure and mark the repeating pairs to create a rectangle using the table saw.
- Glue up the squared up pairs to create a segment that is 1.2" thick x 1.75" high and 5" in length (SEL)
sand and prep the segment for miter cutting.
- I would use a jig shown in the incra pdf.
- I would then set the miter angle for 20 degrees and miter the 9 segments one side (right side) You want to set the stop so the miter cut just to the front edge of the segment. Remember you need a SEL of 5"
- Do the same for the other side.
Basically following the instruction in the incra pdf.
 
I’m just going to make a few suggestions for your next bowl since Mike is handling the other issues.

If you’re making a feature ring bowl, Make the number of segments 16 or 24. The feature ring segment is usually made from two strips that make a chevron, a diamond or a SW design. You cannot do that when you use 18 segments.

Next, if you make the feature ring segment as above, you can then either glue all of the strips together in a board which means that you will have to cut the diamonds, etc., from that board or you can just glue the strips into pairs which means you now only have to trim the top and bottom of each pair and then cut the angles for making a ring.

The simple change of using 16 segments instead of 18 will save you a LOT OF TIME.

This first bowl is to introduce you to a lot of techniques so whatever you do will give you a lot of knowledge that you will need for your next bowls.

Have fun!
Lloyd
 
Back
Top