• Are you looking for a coupon code to buy my software? You can get one from lots of 3rd party sites but they won't work. My software never goes on sale and has never been discounted. The only coupon codes that are given is when I give a club presentation and I offer a discount to the attendees. Other than that, everyone pays the same price.

Collaborative Bowl Project - Closed Segment

Bob, this has be some journey and a learning experience for you and probably most of use. Thanks for taking us along. What are your feeling now that it is finished? Was it worth the effort other than being a learning tool, do you like the final shape?

In my opinion I think for the amount of work and time you spent you created a mediocre bowl. In doing so we have developed some valuable experience for working with very small segments. An example is shown in the bottom rings where a tiny misalignment or out of round ring had a major impact. Another is turning thicker rings and splitting them for easier glue up. This is all going to pay off on your next bowl or vase with a complicated design. Do you have your next one in the planning stage? If so I hope you will once again post the build set of photos.

Stuart
 
Bob It's been a learning experience for me as well as I watch and follow your progress. I will have the benefit of having followed your progress and applying what I have learned to my bowl once I get underway. It is also valuable to have the opinions of others that have followed and participated in this thread.

As far as my design goes I want to have more of an ogee shape combined with the accent woods to hopefully produce the flower design. I also like some of the inter-laced designs that others in the field have done.

Hopefully Lloyds new software will be soon released as the design opportunities will be amazing.

So where to from here from what you have achieved?
 
Thanks for taking the time to document your project for us to learn from. It provided a lot of information for all of us to use.

Hopefully, others will be inspired to document and share their projects.
 
Well this project is complete and filed in boy did I learn a lot. A two week project ending in 2 hours of turning. And end up with a so so bowl. Another lesson learned, it all in the preparation and the early execution.

I’ve been trying to put words to feelings about what all happened, and I’m just chalking it up to learning.

Some of the things learned:

The wedgie sled does a awesome job at cutting very accurate segments, but don’t let this lull you into a this is going to be easy attitude.
Trying to make really thin rings is tough, however the approach that Glenn took with his fixture might be the better rough, all in the preparation and the early execution
Glue up and perfect rings are way more important as the segment count goes up
With all the segments in a 48 segment ring, dry fit up and adjusts in the alignment are crucial and very small changes can make or break the whole thing.
Take your time and be methodical, get it right. I put my head down and plowed through and ended up with a so so bowl. A project needs more attention to detail than what I put into it. (wait till next time!!)

When my wife first saw me working on the first ring her comment was “Are you Fricking NUTS!”. Well I was apprehensive of the whole project after all I have never worked on a 48 segment bowl before. Over my head? Probably, but I learned a lot and doing another 48 segment bowl isn’t going to be as scary.

As far as the next project, nothing picked out but that is to come.

Hope others learned along the way I know I did, and thank you all for the suggestions and help.
 
Bob. B.
Have you considered printing out the ring view in WTP. The ring view gives you the exact template to work from. Assuming your segments are good in Segment Length, you could glue pairs together using a rub joint. I have even modified the SL in WTP if my segments were a bit larger/smaller than in the plan by +/- the outside diameter till my segments match. For example plans call for a SL of .46 (5.25 diameter ring) mine are really .45. I would adjust the outside diameter of the ring to match the .45. Then print that ring view out for a template to follow. Doing so I have good luck in getting the rings pretty well round.

I don't do much in gluing a ring up all at once, unless its like a 8 or 12 segment ring. For rings of 24+ segments, I build up in pairs.
This is just my thoughts.
Your project is going well. I understand the frustration of small pieces and high segment numbers.

do you use any clamping or is it strictly the rub joint?
 
Well after thinking things over..........here we go again. We are going to tackle this same project again. Call me stubborn or just plain stupid. Walnut and cherry, bottom a solid disk (walnut) the rest are all 48 segment rings. OH Boy!! :)
 
Have you thought about adding some walnut wedges at designated spots in your larger ring thus adding a feature like spirals. Maybe 8? You could still make larger rings and slice them off as before. Just throwing it out there.
 
do you use any clamping or is it strictly the rub joint?

I strictly use rub joints for the first pairs (48 becomes 24) (24 becomes 12), etc. I will use a clamp when I put the two halves together (rubber band or hose clamp). Before gluing I do a dry fit of the ring using the printed ring view from WTP as a template.

I have found it is critical that the segments are the same segment length. I don't have a photo of how I align the segments , so I will try to describe. I use a block to align the two segments I am gluing together. After spreading glue over the joining edges I place one segment with it outside face against the block. Then I rub the second piece against the first segment with the final rub pushing the second segment against the block. By doing so the second segment edge is not falling short or protruding the edge of the first segment. I use wax paper over a granite slab as my gluing platform.

I will try and get some photos to show the blocks, and some small segment projects.

(side note. Go Green Bay Packers. Never lived in WI. When my dad introduced me to football Lombardi was the coach. Have followed GB ever since.).

Yes some pictures would be appreciated. I think I'll do a trial run with just the rub joint, I think as you have said that is the way to go. Living in Green Bay it is mandatory to be a Packers Fan
 
Bob I haven't tried it but it you turn the ring round prior to splitting there might be less of a chance for misalignment when gluing it on.
 
stuart I think out of round is just plain out of round. If you turn an out of round ring to round there will be segments cut deeper than others so the y will be wider, thus misalignment. I think the whole thing is to glue the ring up round to begin with.
 
Bob, you are right about gluing the ring up round to begin with. I'm not sure how to do this and being that exact with the number of segments you are using especially the smaller rings. Using hose clamps adds some out of round, zip ties like I use adds less but there is still some pressure from the end. Gluing up half rings is going to cause some when they are trued up and gluing up by pairs leaves many chances. This might be why we rarely see that number of segments on anything other than open segment items.
 
Well this project is complete and filed in boy did I learn a lot. A two week project ending in 2 hours of turning. And end up with a so so bowl. Another lesson learned, it all in the preparation and the early execution.

I’ve been trying to put words to feelings about what all happened, and I’m just chalking it up to learning.

Some of the things learned:

The wedgie sled does a awesome job at cutting very accurate segments, but don’t let this lull you into a this is going to be easy attitude.
Trying to make really thin rings is tough, however the approach that Glenn took with his fixture might be the better rough, all in the preparation and the early execution
Glue up and perfect rings are way more important as the segment count goes up
With all the segments in a 48 segment ring, dry fit up and adjusts in the alignment are crucial and very small changes can make or break the whole thing.
Take your time and be methodical, get it right. I put my head down and plowed through and ended up with a so so bowl. A project needs more attention to detail than what I put into it. (wait till next time!!)

When my wife first saw me working on the first ring her comment was “Are you Fricking NUTS!”. Well I was apprehensive of the whole project after all I have never worked on a 48 segment bowl before. Over my head? Probably, but I learned a lot and doing another 48 segment bowl isn’t going to be as scary.

As far as the next project, nothing picked out but that is to come.

Hope others learned along the way I know I did, and thank you all for the suggestions and help.

I have certainly given clamping a perfect circle a lot of thought. The first two I did I used an MDF scrap turned on the lathe to the OD of the ring. This practice would be great with only a few sizes but when I will have 18 rings to do I'll probably need a half a sheet of MDF. I can probably reduce that by adjusting the outside diameter of my rings to get a select number of rings but then I am wasting the more expensive wood.

My whole purpose of making a 48 segment bowl was to:
1.) replicate a flower type design in a bowl.( more segments the more design opportunities)
2.) use up some of the scrap strips of lumber I have accumulated over the years
3.) I enjoy the planning and execution of the design challenges

I think Stuart is right in saying that the open segment bowl is maybe a better choice for the large segment count.

I also think that the group here is large enough that we could brainstorm a better way to clamp the circle. I like the tie wrap idea but was thinking of clipping the end off and then using CA to reattach it but turned to keep the band flatter where it joins and tightens. I also need to find some longer tie wraps to try this with. I realize you can chain them together but we need to avoid the bump. Maybe a splice and a backer to reinforce the join may work. Again just thinking out loud.
 
I strictly use rub joints for the first pairs (48 becomes 24) (24 becomes 12), etc. I will use a clamp when I put the two halves together (rubber band or hose clamp). Before gluing I do a dry fit of the ring using the printed ring view from WTP as a template.

I have found it is critical that the segments are the same segment length. I don't have a photo of how I align the segments , so I will try to describe. I use a block to align the two segments I am gluing together. After spreading glue over the joining edges I place one segment with it outside face against the block. Then I rub the second piece against the first segment with the final rub pushing the second segment against the block. By doing so the second segment edge is not falling short or protruding the edge of the first segment. I use wax paper over a granite slab as my gluing platform.

I will try and get some photos to show the blocks, and some small segment projects.

(side note. Go Green Bay Packers. Never lived in WI. When my dad introduced me to football Lombardi was the coach. Have followed GB ever since.).

I think mfisher has the answer. Rub joints and no clamps. This is what I am going to try first. Aslo if this works Glenn you will not need the Titebond II extened
 
Well glutton for punishment I am. We started again!
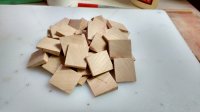
First double ring looks PERFECT so far:
2016-10-03 12.26.52.jpg
OK just a little humor :)


2016-10-03 12.38.47.jpg 2016-10-03 12.38.58.jpg
Board width was 1.04" and segment length was 0.24"
Plans called for a OD of 3.73", ended up 3.743"
Plans called for ID of 1.65", ended up with 1.66"
I guess I'll probably will never get one that close again.
But I am starting off strong

Now to glue it up!
 
Last edited:
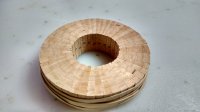
Ring glued and clamped up
2016-10-03 15.19.40.jpg
dimensions OD
1 - 3.727"
2 - 3.750"
3 - 3.797"
4 - 3.755"
5 - 3.759"
What do you think are we round enough or should I try again?
 
Bob: I am out of town and don't have access to my shop. Here is a quick diagram of the alignment block I was trying to describe when doing rub joints. It basically forces the outside edges to be aligned evenly. I noticed in your post 118 a few segments are sticking out from the others.

The block has to have a good flat even surface. when finalizing the rub joint the one segment is placed flush against the block. the second segment is pressed against the joining edge of the first segment and pushed till the corner hits the block. I hold them in place for 15-30 seconds, then set them aside to dry.

Give it a try and see if it doesn't help in getting the outsides to match up.


jig 1.jpg
 
Back
Top